I recently took delivery of two NVIDIA DGX Sparks (the GB10 units I later wired together for the small-message NCCL latency benchmark). The out-of-box experience is genuinely slick — right up until one of the two bricked itself on the very first software update and dropped me into a kernel panic. This post is the other half of the story: the setup flow, and exactly how I brought the dead one back.
The out-of-box setup flow
There’s no monitor-and-keyboard dance to start with. The Spark behaves like a new phone:
- Power it on and it broadcasts its own Wi-Fi hotspot.
- You join that hotspot from your laptop or phone, which drops you into the Spark’s setup wizard.
- Through the wizard you hand the Spark your real Wi-Fi credentials.
- Once it’s online, it pulls down and installs the latest software and firmware.
Clean and friendly. Unit one sailed through it. Unit two got to the “install the new software and firmware” step, applied a kernel update, rebooted — and never came back.
The panic
Instead of the dashboard, I got this:
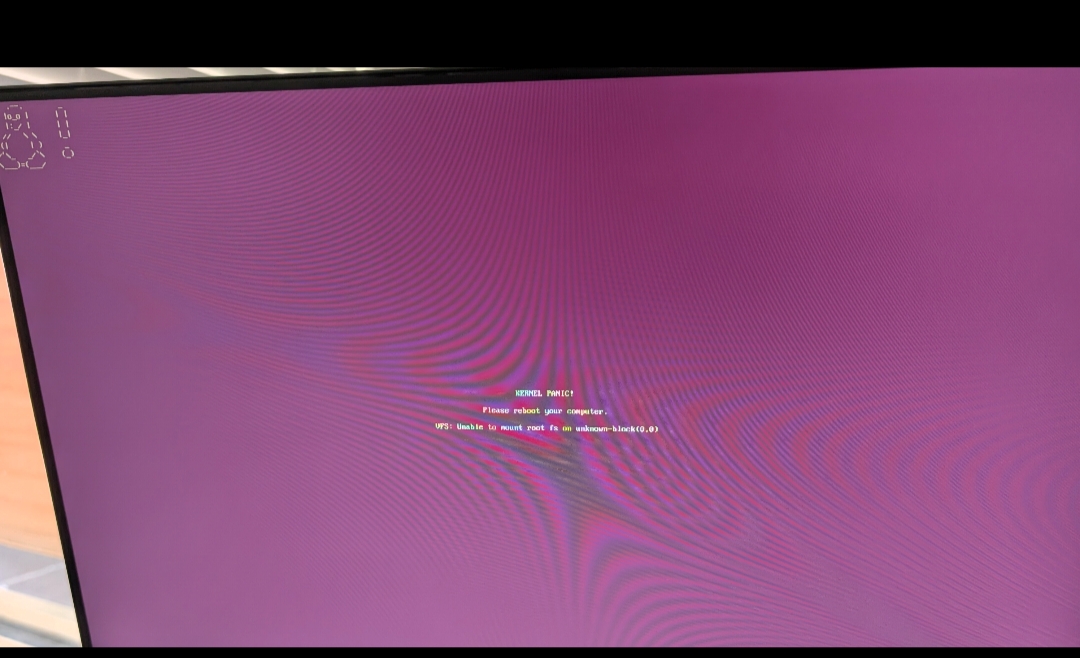
VFS: Unable to mount root fs on unknown-block(0,0)
Kernel panic - not syncing
This is the classic “the kernel booted but there’s no initramfs to hand it a root filesystem” failure. NVIDIA has an official forum guide for exactly this, and it’s worth reading in full because it explains the why: the dashboard-driven kernel update (in their case 6.17.0-1008-nvidia → 6.17.0-1014-nvidia) installs the new kernel image but the post-install script dies before generating the initrd.img. GRUB then boots a kernel that has no initramfs, and because these headless units ship with GRUB_TIMEOUT=0 there’s no boot menu to fall back to a working kernel. You go straight into the wall.
The fix is conceptually simple: boot from external media, chroot into the installed system, regenerate the initramfs, and fix GRUB so this can’t silently brick you again.
Building the recovery USB
A couple of things tripped me up here, so be ready for them.
Get the server ISO, not desktop. I needed ubuntu-26.04-live-server-arm64.iso. The desktop arm64 image simply didn’t show up as an option for me — server is the one to grab.
Write it with dd. On my Linux desktop:
sudo dd if=ubuntu-26.04-live-server-arm64.iso of=/dev/sdb bs=4M status=progress oflag=sync
⚠️ The
of=/dev/sdbis my USB stick. Yours may be/dev/sdc,/dev/sdd, etc. Check withlsblkfirst and triple-check the letter —ddwill happily overwrite the wrong disk without asking.
You need a USB-A → USB-C cable (or adapter). The DGX Spark only exposes USB-C ports, and my flash drive was USB-A. Without that cable I’d have been stuck before I started.
Following the guide — and where mine diverged
NVIDIA’s guide assumes you boot the live environment, then jump to a TTY with Ctrl+Alt+F2 and log in as ubuntu. That’s not what happened for me. For some reason the live image never gave me a live session — it went straight into the installer.
So I improvised, and it worked perfectly: on the first screen of the installer wizard, there’s a Help menu in the top corner, and from there you can “Enter shell”. That shell is a perfectly good root environment — exactly what the guide needs. From there everything in the guide applies.
Once in the shell, mount the real root partition and chroot into it (per the guide):
sudo -i
mount /dev/nvme0n1p2 /mnt/spark
mount --bind /dev      /mnt/spark/dev
mount --bind /dev/pts  /mnt/spark/dev/pts
mount --bind /proc     /mnt/spark/proc
mount --bind /sys      /mnt/spark/sys
mount --bind /run      /mnt/spark/run
mount /dev/nvme0n1p1   /mnt/spark/boot/efi
chroot /mnt/spark /bin/bash
Then regenerate the missing initramfs for the kernel that failed (use your version string):
update-initramfs -c -k 6.17.0-1014-nvidia
The guide then has you clear the half-finished package state with DKMS:
dkms autoinstall --force -k 6.17.0-1014-nvidia
dpkg --configure -a
Here’s my second divergence: the dkms command did not work for me. It errored out rather than completing cleanly. But — and this is the important part — it didn’t matter. I let dpkg --configure -a and the GRUB steps run anyway, and the recovery still went through and the system came back fully working. So if your dkms line throws an error, don’t panic (again): keep going.
Finally, regenerate GRUB and — critically — give yourself a boot menu so a future bad update doesn’t trap you headless:
update-grub
Edit /etc/default/grub:
GRUB_TIMEOUT_STYLE=menu
GRUB_TIMEOUT=5
update-grub
Then exit the chroot, unmount, and reboot:
exit
umount -l /mnt/spark/sys
umount /mnt/spark/proc
umount /mnt/spark/dev/pts
umount /mnt/spark/dev
umount /mnt/spark/boot/efi
umount /mnt/spark
reboot
Pull the USB on the way down, and the Spark boots back into a healthy system.
Takeaways
- The hotspot-and-wizard setup is lovely when it works — but the dashboard update path can brick a unit with zero local recovery affordance (
GRUB_TIMEOUT=0). Setting a non-zero GRUB timeout the moment a unit is healthy is the single best insurance. - Have an ARM64 Ubuntu Server live USB and a USB-A→USB-C cable ready before you need them. You do not want to be sourcing a USB-C cable while one of your boxes is down.
- If the live image dumps you straight into the installer, the installer’s Help → shell is a perfectly good rescue environment.
- A failing
dkmsstep isn’t necessarily fatal —update-initramfs+dpkg --configure -a+update-grubwere what actually mattered for me.
Two Sparks, one near-heart-attack, and a happy ending. Next stop: wiring them together — which is the NCCL latency post.